I love creating things that bring joy and imagination to life. If you’re a fan of My Melody and Toca Boca, you know how hard it can be to find affordable and creative ways to bring those worlds into your home. This guide is here to help.
We’ll show you how to make a toca boca paper doll house casa de my melody para imprimir. It’s a fun and easy project that lets you create a charming and detailed dollhouse. You don’t need any special skills, just a bit of creativity and some basic materials.
Let’s get started!
Materials and Tools You’ll Need
Let’s dive into the essentials, and first up, you’ll need some basic supplies. Think cardstock, scissors, glue, and markers.
These are your building blocks.
Now, if you want to print out designs, choosing the right paper is key. Go for a heavier weight to ensure it holds up well. And don’t forget to adjust your printer settings for the best quality.
It can make a big difference.
For those who like to add a personal touch, consider some additional decor. Stickers, fabric, and small trinkets can really bring your project to life.
If you’re working on something like a toca boca paper doll house casa de my melody para imprimir, these little extras can make it even more special.
Pro tip: Always test your printer settings on a single sheet first. Saves you from wasting a whole stack of paper.
Designing Your Dollhouse: Inspiration from Toca Boca
Toca Boca’s games are known for their vibrant and playful designs. The key is in the color schemes—think bright, pastel colors that pop.
CAPS: Clean lines and simple shapes make the aesthetic feel modern and welcoming.
When it comes to your dollhouse, you can use these elements to create a fun and inviting space.
My Melody Integration: My Melody adds a touch of sweetness and cuteness. Think soft pinks, whites, and pastels.
You can blend this style into your dollhouse by adding little details like tiny flowers, cute furniture, and pastel decorations.
toca boca paper doll house casa de my melody para imprimir is a great resource for printable designs.
Customization Ideas: Personalize your dollhouse with themed rooms. How about a cozy reading nook or a mini kitchen?
Add unique decorations like handmade rugs or tiny picture frames.
Get creative and let your imagination run wild. There’s no right or wrong way to design your dollhouse.
Remember, the goal is to have fun and create a space that reflects your personality.
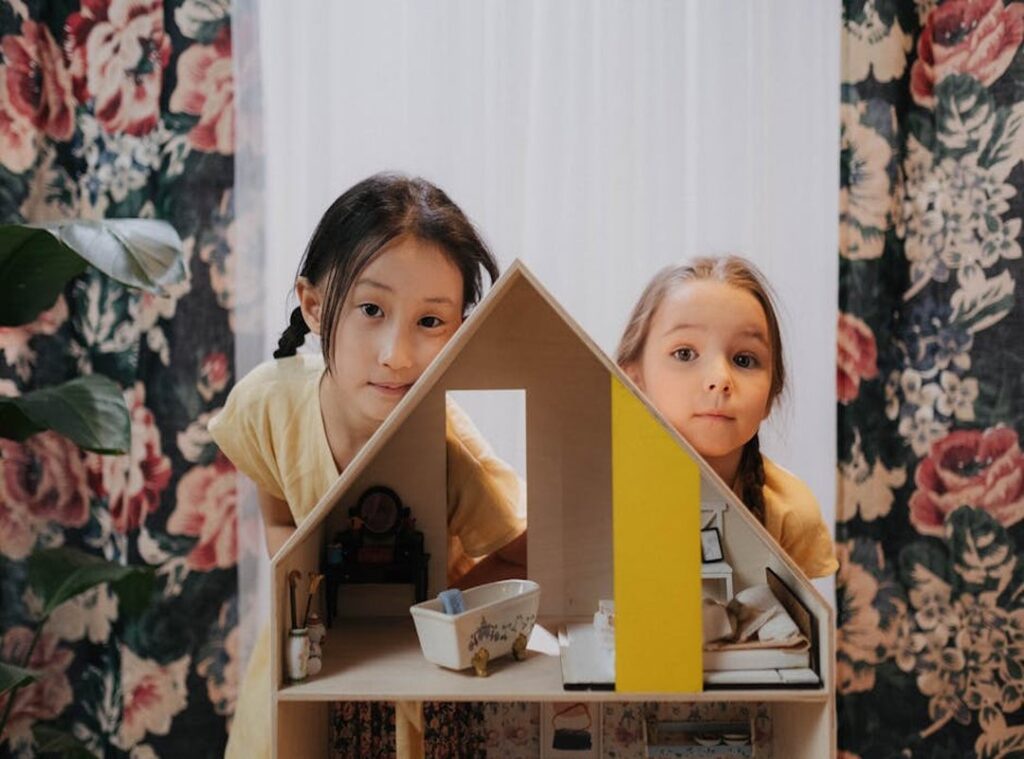
Step-by-Step Assembly Instructions
I remember the first time I tried to build a dollhouse. It was a disaster. The walls were crooked, and the roof kept sliding off.
But with a bit of patience and some better instructions, it all came together. Let’s make sure you get it right the first time.
Base Structure
Start by cutting the base. Use a sharp saw and follow the measurements carefully. Once cut, sand the edges to smooth them out.
This is crucial for a clean look.
Assemble the base using wood glue and nails. Make sure everything is square, and a level can help here.
Trust me, a wobbly base will ruin your whole project.
Walls and Floors
Next, attach the walls to the base, and use wood glue and nails for this. Align the walls with the base and check for gaps.
If there are any, fill them with wood filler.
For the floors, start from the bottom and work your way up. Glue and nail each floor in place, and check for stability as you go.
A little tip: use clamps to hold the pieces in place while the glue dries. It makes a big difference.
Roof and Chimney
Adding the roof is the next step. Carefully align it with the top of the walls. Use wood glue and nails to secure it.
If you’re adding a chimney, now’s the time. Cut and attach it to the roof.
If you want to add a balcony, do that after the roof. It’s a nice touch and adds character, and just make sure it’s securely attached.
Building a dollhouse can be a lot of fun, especially if you have a good set of instructions. And hey, if you need more tips or inspiration, check out Consolepowerupdaily. They have a ton of creative ideas and tutorials.
Remember, take your time and enjoy the process. There’s something special about creating a toca boca paper doll house casa de my melody para imprimir from scratch.
Decorating Your Dollhouse

Decorating a dollhouse can be a fun and creative project. Let’s break it down room by room.
Living Room
Think cozy and inviting. You can go for a modern look with sleek furniture or a more traditional vibe with antique-style pieces. Add some soft lighting, like tiny lamps, to make the space feel warm.
Bedroom
The bedroom is all about comfort and style. Choose a theme—maybe something inspired by your favorite movie or book. For example, a Harry Potter themed room with a tiny four-poster bed and a little Hedwig on the nightstand.
Kitchen
The kitchen should be functional and cute. Think of a mini stove, a tiny fridge, and a small table set. Don’t forget the little details like a miniature tea set or a tiny fruit bowl.
It’s all in the little things, right?
Furniture and Accessories
Creating and placing furniture and accessories is where the magic happens. You can find templates online or even design your own. Use materials like cardboard, foam, and fabric.
Assembly tips: start with the base, then add the sides, and finally the top. Glue everything together carefully.
Adding Characters
Now, let’s bring your dollhouse to life with characters. My Melody and her friends are perfect for adding a touch of cuteness. You can also include other Toca Boca characters.
Print out toca boca paper doll house casa de my melody para imprimir and use them as your dolls. Place them in different rooms to create little scenes and stories.
| Room | Furniture Ideas | Accessories |
|---|---|---|
| Living Room | Sofa, Coffee Table, Lamp | Rugs, Pillows, Books |
| Bedroom | Bed, Nightstand, Dresser | Lamps, Pictures, Toys |
| Kitchen | Stove, Fridge, Table | Pots, Pans, Dishes |
Pro tip: Mix and match themes to create a unique and personal dollhouse. Have fun and let your creativity run wild!
Final Touches and Display
Adding the final details to your dollhouse can make all the difference. Think about windows, doors, and decorative elements. These small touches bring your creation to life.
- Choose windows that match the style of your house.
- Add doors that complement the overall design.
- Decorative elements like tiny furniture or plants can add charm.
When it comes to displaying your completed dollhouse, consider a few key tips. First, find a spot that’s visible but out of the way. A shelf or a dedicated table works well.
Lighting is crucial. Good lighting can highlight the details and make your dollhouse look even more impressive. Natural light during the day and a soft, warm lamp at night can do wonders.
For a background, think about a simple, neutral backdrop. This keeps the focus on your dollhouse. Some people even use a printed backdrop, like toca boca paper doll house casa de my melody para imprimir, to add a themed touch.
Remember, the goal is to showcase your hard work and creativity. With the right finishing touches and display, your dollhouse will be a showstopper.
Bringing Your My Melody Dollhouse to Life
Start by gathering all the materials you need, including cardboard, glue, and toca boca paper doll house casa de my melody para imprimir. Plan your design, considering the layout and the different rooms you want to create. Add personal touches like wallpaper, furniture, and decorations to make each space unique.
Remember, the key is to have fun and let your creativity flow. Following this guide will result in a beautiful, personalized, and fun project. Share your creations with friends and family.
Enjoy the process of bringing your imagination to life.
 Joan Holtezer played an essential role in shaping Console Power Up Daily into the engaging platform it is today. With a keen eye for detail and a strong passion for gaming, Joan contributed to building the site’s structure and ensuring its content resonates with the community. Her efforts in refining features and enhancing the user experience helped the project grow into a trusted source for gamers worldwide.